

Hey! Today I wanted to share with you a post about some of the different DIY wedding decorations that I recently did. My cousin just got married and asked me to decorate for her wedding. After some inspiration from Pinterest and a lot of help from my mom, I got to see everything put together for the wedding! It was such a special day, and I enjoyed getting to be a part of the wedding. I want to share with you some wedding decoration ideas that are easy to recreate!
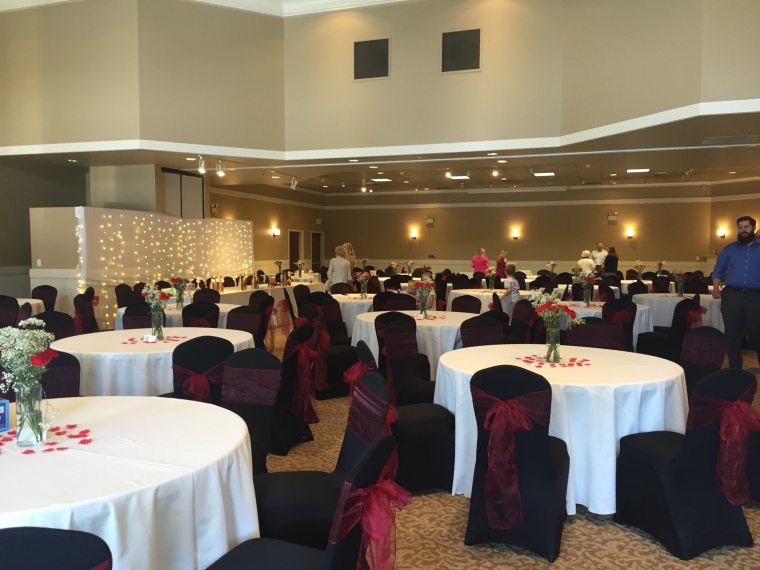
For the tables, we decorated each chair with an oversized red bow. This looked great at the beginning of the wedding, but by the end a lot of the ribbon had fallen off or was taken off by little kids. I would recommend double-knotting the bows or taping them to the chairs to avoid that!
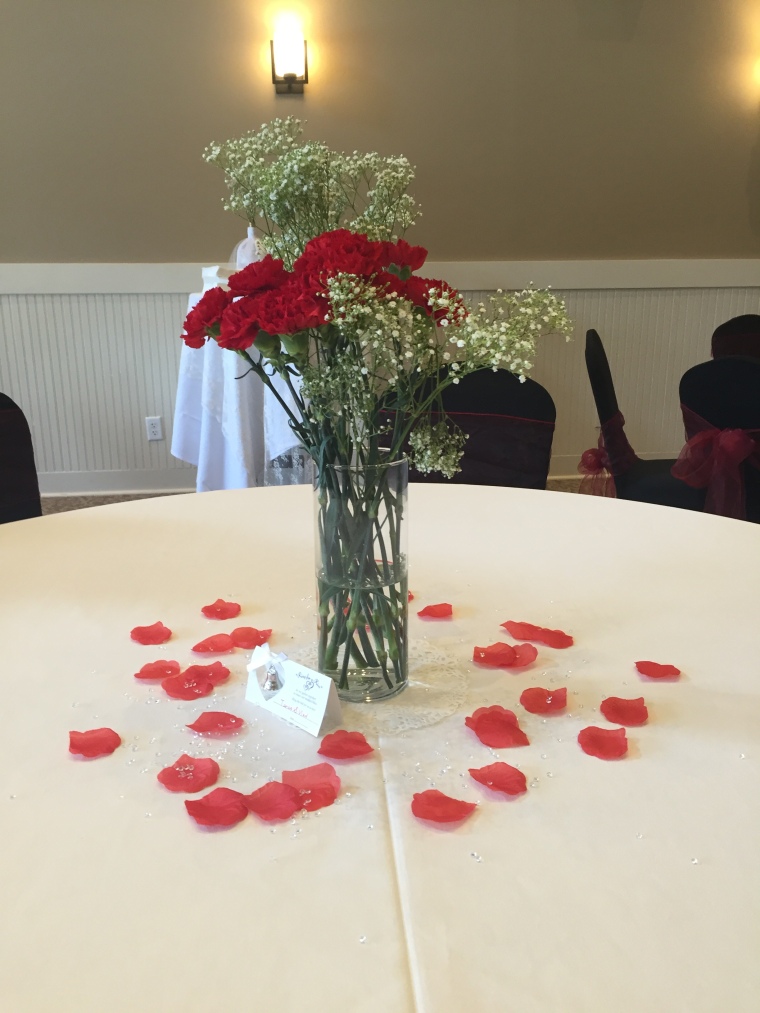
We used tall vases to decorate the tables with red carnations and baby’s breath. I also decorated the tables by spreading rose petals and crystals around the center.
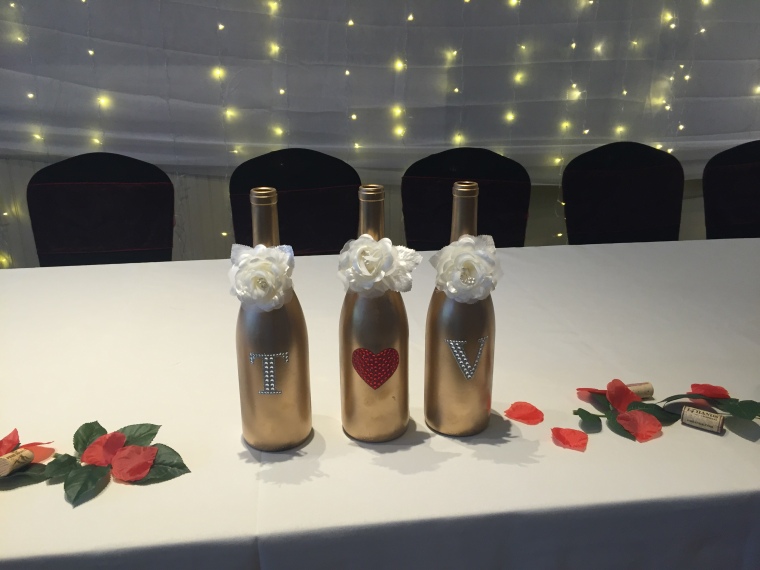
My mom had the idea of creating personalized wine bottles, so we spray painted wine bottles and found rhinestoned initial stickers and fake flowers at Michaels to stick on top. These bottles sat at the bridal party table, and I love how they turned out!
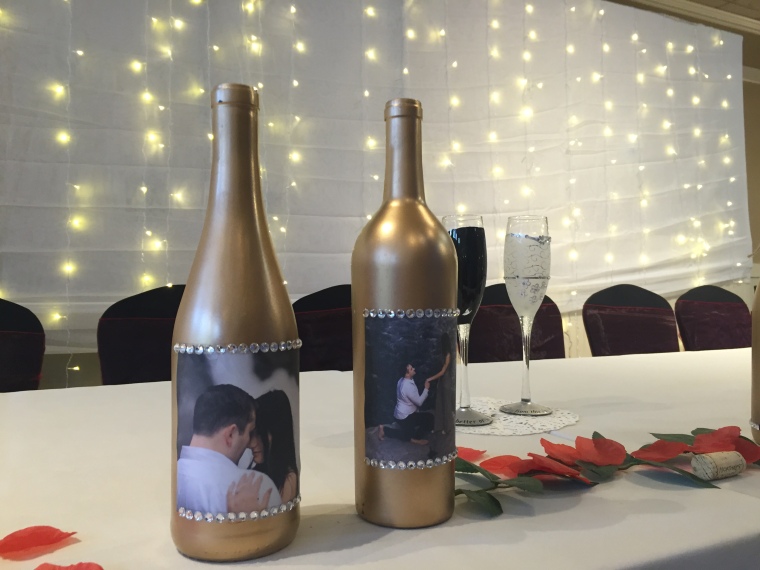
We ended up spray painting a ton of bottles, so I thought it would be cool to put photo labels on them. I bought adhesive printer paper at Office Depot, and printed out pictures of the couple’s engagement photos. I also bought a sheet of rhinesones at Micheals, and stuck a row of them on the top and bottom of the photo, which gives the bottle a classy and elegant look.
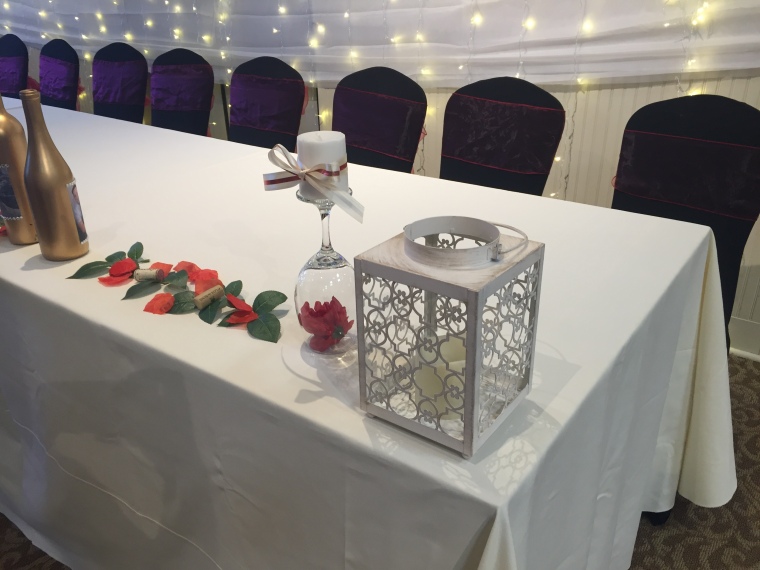
We also scored some great deals on the bridal table centerpieces. The lanterns were from Big Lots, and they have a battery-operated candle, which is great because if it gets knocked over, there isn’t a fire hazard. The wine glasses, fake flowers and candles were from the Dollar Store, which look great for this winery wedding.
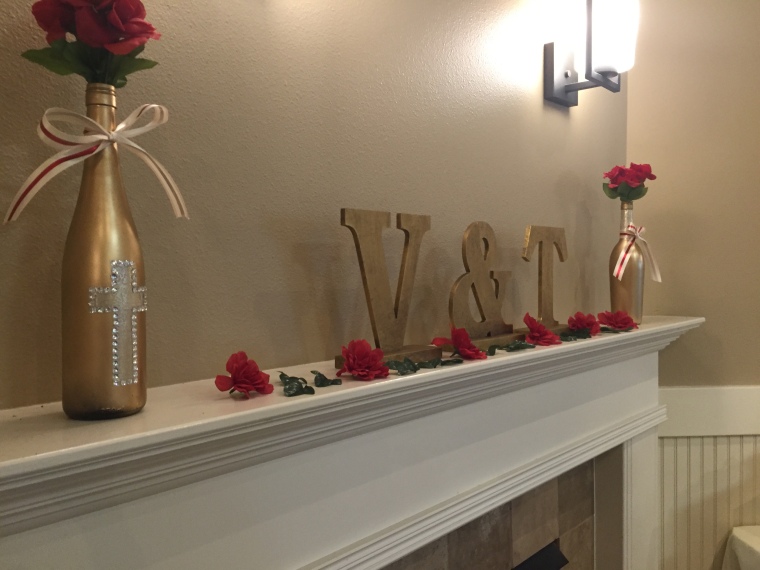
The venue also had a mantle in the reception room, so I found some home decor initials at Michaels, which matched their wedding colors. The couple is Christian, so I loved the cross wine bottle because it incorporated their spirituality. It was very easy to make; I just put on some decorative tape in the shape of a cross and then outlined the tape with the same rhinestones I used for the photo bottles.
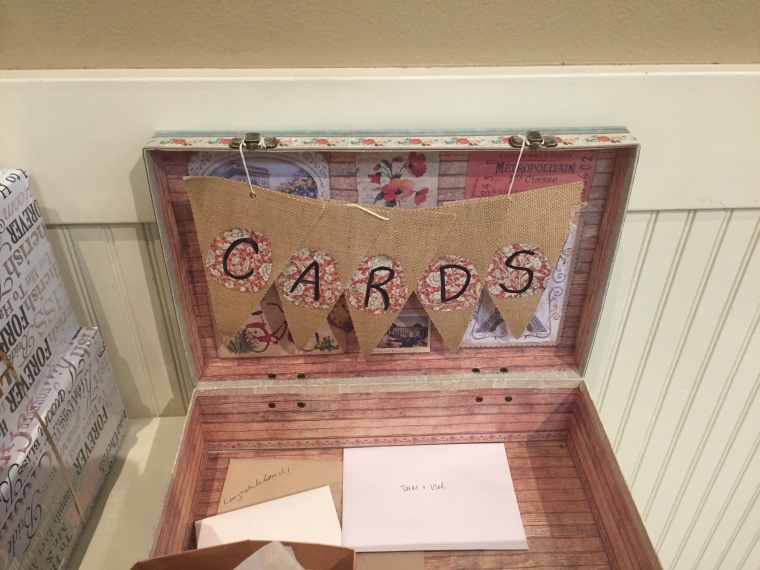
At the gift table, the bride wanted a separate basket for cards. Since her theme was vintage, I thought it would be cute to use a suitcase instead of a basket. My mom and I weren’t able to find a real vintage suitcase, but this one from Ross looked pretty close to what we wanted. Then I made a little banner to specify what the box was for.
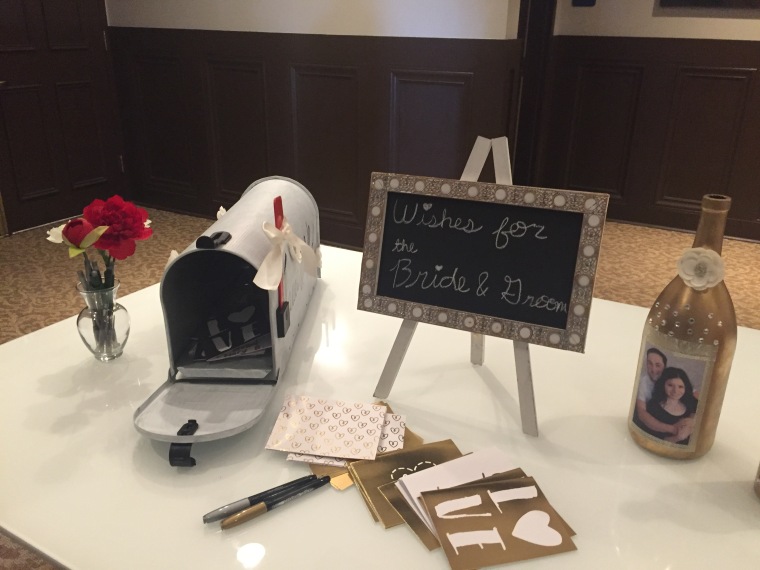
Some weddings have baskets for “Wishes for the Bride and Groom.” I found a cute chalkboard at Michaels and some cards that fit the romantic vintage theme and put the Wishes station right next to the guestbook so it was convenient for guests.
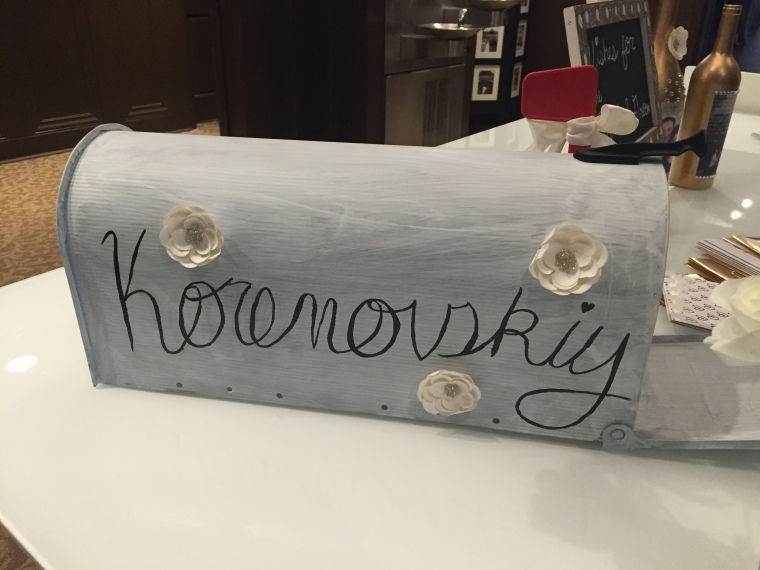
Since the wedding was a vintage theme, I thought a rustic mailbox would look super cute to serve as a place to store the Wishes. I bought a cheap mailbox at Walmart, and my dad painted it in a way that made the finish look vintage. Then I wrote their names in curvise with black paint on both sides, and finished by placing flowers on the box and tying a ribbon on the flag.
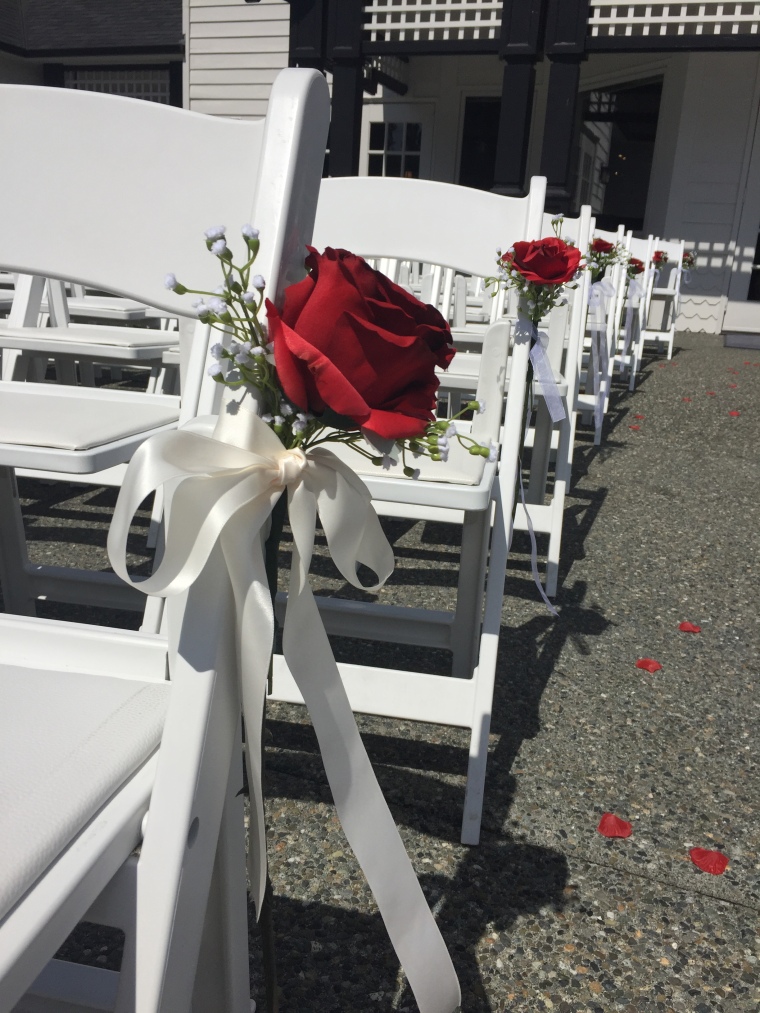
I also wanted to share the aisle centerpieces for the ceremony. My mom and I tied fake roses and baby’s breath to the chairs with ribbon, and then sprinkled rose petals on the aisle. I highly recommend using fake flowers, especially if the ceremony is in the summer, to avoid having the flowers wilt right in front of you! The day of the wedding was super hot, and I’m so glad we had fake flowers.
One of the best parts of these decorations is that most of the items can be reused after the wedding. The couple could use some of the decorations, such as the wine bottles, the mailbox, and the mantle pieces, to decorate their home. I hope you guys enjoyed this post, and I’d love to hear which decoration was your favorite!


