My Greek Experience

FullSizeRender.jpg 2
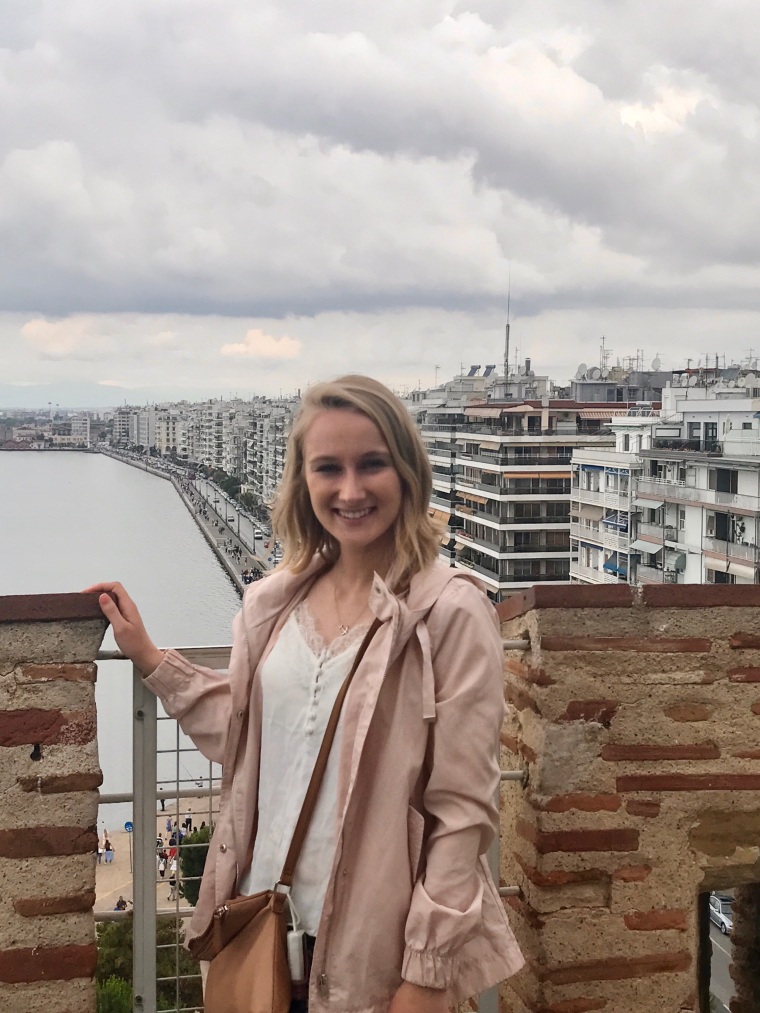
Today is my last day in Greece, and tomorrow I will be returning to Washington. During my time here, I took many pictures, bought far too many souvenirs and ate lots of gyros. There have been ups and downs, from the few times I felt homesick to the amazing interviews I got to do. Overall, my trip here has been amazing and I made so many incredible memories.

As a college student, I urge all other students to study abroad too. Getting the opportunity to experience a different country allowed me to truly grow as a person. When I came to Greece I expected to learn a lot about the country, but I also learned a lot about myself. I’m definitely infected with a travel bug, and look forward to my next trip abroad. Never did I think I would learn so much about the country of Greece.

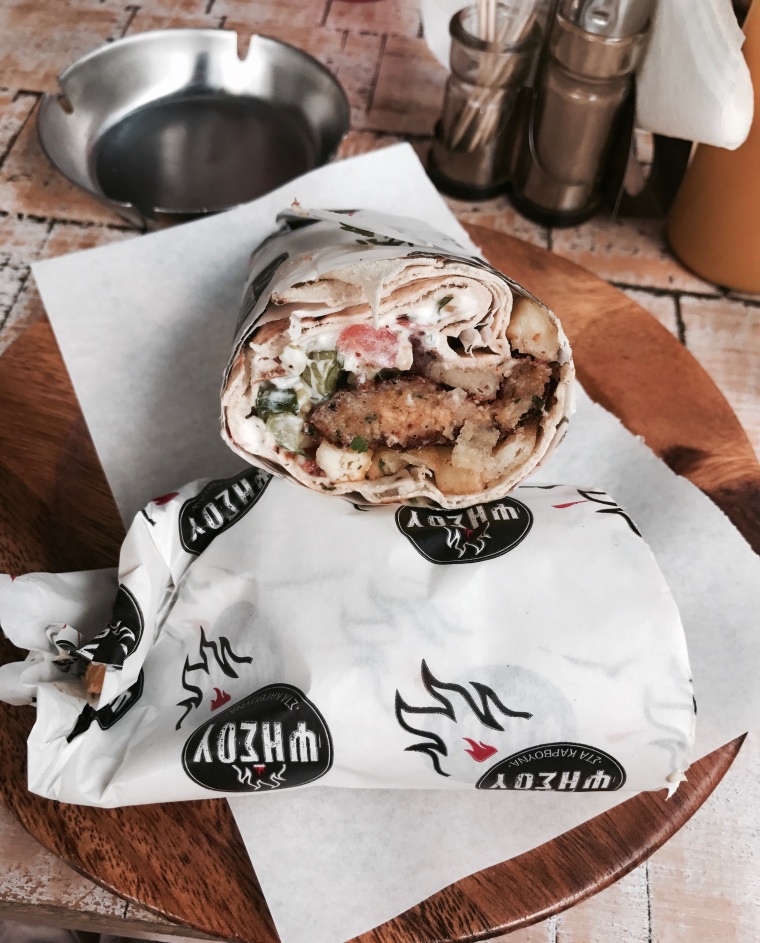
After spending a month here, I discovered many different foods. My favorite was certainly the pastitsio, which is basically the Greek version of lasagna. Unfortunately, I was only able to eat it once because it was very difficult to find. I also enjoyed the endless  supply of gyros. The thing that surprised me the most was the fact that Greeks put french fries in everything! I even ordered a cheeseburger that had fries in it.

I also enjoyed shopping while I was here. A lot of the clothing is far too over-the-top, but I found some great stores such as Bershka, Oysho and Axel. While I was here, I stocked up on some tops, purses and shoes, but couldn’t go too crazy because everything has to fit into my already-stuffed suitcase. And of course, I had to get enough souvenirs for my loved ones.

While I have many great memories, there are two experiences that stood out the most. The first was our weekend trip to Crete. A group of us stayed in Chania for the weekend and enjoyed the beaches and street shopping. I loved Crete and could have spent an entire week there. My other highlight was interviewing a Syrian refugee. The woman I had the opportunity to interview was a mother with an amazing story to tell. I am looking forward to writing and putting together the news story about her, and will never forget the experience I had talking with her.

Meeting people and seeing how people live here in Greece has made me so fortunate for my own life, and I have developed a new respect both for Greece and for the United States. I know that my experience abroad has made me a better global citizen, and I look forward to spending more time visiting other countries in the future.


Greece’s Homeless Animals

The Syrian refugee crisis has affected Greece by contributing to an influx of homeless and stateless individuals. These people are trying desperately to fit into society and find their way to a better life. They want to feel loved by society. Humanitarian organizations exist to help these refugees, but there doesn’t seem to be as much help for other homeless beings.

Every time I walk down the street, I notice multiple homeless cats and dogs roaming the city. The dogs oftentimes are covered in dried mud and matted fur, and the cats have hairless spots from previous cat fights. The dogs sometimes even walk around in groups of two or three buddies, resembling a neighborhood gang.

The idea of stray animals really bothered me at first, and every time I saw a homeless animals I immediately thought about how it should be taken to an animal shelter and found a home. After all, dogs and cats are domesticated animals and should have owners, right?

Well the more I think about it the more I accept that these animals live freely. In the U.S., stray animals are taken to shelters with the hope of finding a loving family. Those who do are given a new start. But there is a large number of shelter dogs and cats who are euthanized each year because they can’t get adopted. The animals in Greece may not have owners, but they seem to be enjoying their lives. They walk around the streets minding their own business, and a lot of stores and restaurants leave food and water on the street for the animals who come by. The strays are all very friendly and sometimes come up to humans with food. As someone who is usually afraid of large dogs, I’m surprisingly comfortable around the strays because they aren’t aggressive. It seems to be part of the culture; these animals are just as much a part of the city as the humans.

A major difficulty of allowing these animals to roam free, however, is being unable to control the population. Stray animals aren’t fixed, so it isn’t uncommon to see pregnant strays or babies on the streets. Reproduction should be controlled, and I’m curious if there are any organizations that help to fix strays.

Getting Lost in Translation

FullSizeRender.jpg

One of the things about Greece is certainly the food, but it’s also one of the most stressful when you have a food allergy. Navigating restaurant menus and having to ask every waiter if the food contains nuts can get very redundant. A lot of the desserts in Greece, such as Baklava, contain tree nuts, and most restaurants don’t make it clear what food has nuts.

Before I left for Greece, I put a translation in my phone for the phrase, “Does this contain nuts?” This way I could simply show the waiter my phone because some don’t know the word for nuts in English.

Today a group of friends and I went to get gyros for lunch at a little cafe in Thessaloniki. When we sat down and looked at the menu I was excited to see that they sold Falafel, which I haven’t had since I came because it is typically found closer to the Middle East. Falafel is made of garbanzo beans, and usually doesn’t contain nuts but you can never be sure. The waiter went around the table asking for our lunch orders. When he came to me, I told him I wanted a falafel gyro, and asked if it had nuts in it. He appeared to not understand what I was trying to say, so I held up the translated phrase on my phone. He looked at it, and started laughing.

“That’s a different kind of nuts,” he joked.

The phrase I had written down was Έχει τα αρχίδι, which Google translates to, “Is there nuts in this?” However, when I went to look up the word αρχίδι, I found out that it actually directly translates to “testicles.”

That was pretty embarrassing, and the waiter and my friends just started laughing.

Getting lost in translation happens to many Americans traveling abroad, but now I know not to trust Google translate.

At least the falafel gyro was good, and didn’t contain nuts…

Neutrogena Acne Correct & Cover Review

As summer begins to wind down, I always like to rethink my skincare routines and try new products. Neutrogena recently released their Oil-Free Acne Correct & Cover pink grapefruit moisturizer, which really sparked my interest. I haven’t ever been a huge fan of BB creams, because I prefer either powder foundations or cream foundations. But this moisturizer seemed especially intriguing because it claims to correct acne, so I thought it was worth a try.

As a seasoned pro when it comes to dealing with acne, I was super excited to see that this moisturizer contains salicylic acid, which it a powerful ingredient in treating acne. I also liked that this moisturizer is tinted, so I thought it might be similar to a BB cream. That way, I can skip the foundation for a more natural look.

The first thing I noticed when I first applied this moisturizer is the color. I have light skin, but it is warm-toned. This moisturizer matched my skin tone exceptionally, but that is completely by chance. If I applied this on my cool-toned, fairer skinned sister, it would not match AT ALL. Since this moisturizer only comes in two shades, I don’t see how anyone who doesn’t perfectly match the shade could wear it without applying makeup after.

Another important note is that this is NOT anything like a BB cream. I have the Smashbox BB cream, which has relatively good coverage, but this is certainly much more of a moisturizer than anything else. Now I realize that a tinted moistuizer is much different than a BB cream, but I wasn’t expecting such light coverage. When Neutrogena says this product has sheer coverage, they mean it!

I love that this product allows me to embrace my skin while working throughout the day to protect against acne. I get hormonal breakouts, but my skin is usually clear the rest of the time. I would never actually use this product during the time of my breakout, because I prefer higher coverage to cover my acne. However, this product is a great replacement for the powder foundation I regularly use. I also saw that some people recommended it as a primer to wear underneath foundation. I haven’t tried that, but that sounds like it would do the trick.

This is the kind of product I wish I could have worn back when I was eleven years old. My mom didn’t let me wear makeup until I was fourteen, but I had acne starting at around age eleven. This is a great product for young girls who aren’t ready to wear full face foundation but still want something to help with their acne.

IMG_7717
After applying the moisturizer

While I don’t see this product being a perfect match for a lot of users, I do believe it is a holy grail product for a very specific target market. That being said, I think it is worth a try if you struggle with occassional breakouts and aren’t into wearing full face foundation.

IMG_7735
Full makeup using only moisturizer, blush and highlighter for my face

This product is great for:

  • Girls with warm-toned light skin (or medium skin for the other shade)
  • Occasional breakouts
  • Those who like sheer coverage
  • Young teens who aren’t yet wearing full makeup

XOXO,

Ali

I like to follow back:)

Instagram  Twitter

Wedding Decorations

Hey! Today I wanted to share with you a post about some of the different DIY wedding decorations that I recently did. My cousin just got married and asked me to decorate for her wedding. After some inspiration from Pinterest and a lot of help from my mom, I got to see everything put together for the wedding! It was such a special day, and I enjoyed getting to be a part of the wedding. I want to share with you some wedding decoration ideas that are easy to recreate!

IMG_7637

For the tables, we decorated each chair with an oversized red bow. This looked great at the beginning of the wedding, but by the end a lot of the ribbon had fallen off or was taken off by little kids. I would recommend double-knotting the bows or taping them to the chairs to avoid that!

IMG_7641

We used tall vases to decorate the tables with red carnations and baby’s breath. I also decorated the tables by spreading rose petals and crystals around the center.

IMG_7643

My mom had the idea of creating personalized wine bottles, so we spray painted wine bottles and found rhinestoned initial stickers and fake flowers at Michaels to stick on top. These bottles sat at the bridal party table, and I love how they turned out!

IMG_7644

We ended up spray painting a ton of bottles, so I thought it would be cool to put photo labels on them. I bought adhesive printer paper at Office Depot, and printed out pictures of the couple’s engagement photos. I also bought a sheet of rhinesones at Micheals, and stuck a row of them on the top and bottom of the photo, which gives the bottle a classy and elegant look.

IMG_7646

We also scored some great deals on the bridal table centerpieces. The lanterns were from Big Lots, and they have a battery-operated candle, which is great because if it gets knocked over, there isn’t a fire hazard. The wine glasses, fake flowers and candles were from the Dollar Store, which look great for this winery wedding.

IMG_7650

The venue also had a mantle in the reception room, so I found some home decor initials at Michaels, which matched their wedding colors. The couple is Christian, so I loved the cross wine bottle because it incorporated their spirituality. It was very easy to make; I just put on some decorative tape in the shape of a cross and then outlined the tape with the same rhinestones I used for the photo bottles.

IMG_7653

At the gift table, the bride wanted a separate basket for cards. Since her theme was vintage, I thought it would be cute to use a suitcase instead of a basket. My mom and I weren’t able to find a real vintage suitcase, but this one from Ross looked pretty close to what we wanted. Then I made a little banner to specify what the box was for.

IMG_7656

Some weddings have baskets for “Wishes for the Bride and Groom.” I found a cute chalkboard at Michaels and some cards that fit the romantic vintage theme and put the Wishes station right next to the guestbook so it was convenient for guests.

IMG_7658

Since the wedding was a vintage theme, I thought a rustic mailbox would look super cute to serve as a place to store the Wishes. I bought a cheap mailbox at Walmart, and my dad painted it in a way that made the finish look vintage. Then I wrote their names in curvise with black paint on both sides, and finished by placing flowers on the box and tying a ribbon on the flag.

IMG_7669

I also wanted to share the aisle centerpieces for the ceremony. My mom and I tied fake roses and baby’s breath to the chairs with ribbon, and then sprinkled rose petals on the aisle. I highly recommend using fake flowers, especially if the ceremony is in the summer, to avoid having the flowers wilt right in front of you! The day of the wedding was super hot, and I’m so glad we had fake flowers.

One of the best parts of these decorations is that most of the items can be reused after the wedding. The couple could use some of the decorations, such as the wine bottles, the mailbox, and the mantle pieces, to decorate their home. I hope you guys enjoyed this post, and I’d love to hear which decoration was your favorite!

Makeup Storage Cabinet

Hey guys, I just wanted to share with you all my newest DIY project! I have been accumulating more and more makeup, and I haven’t had nearly enough room for it all! I have a small vanity, but it isn’t big enough to store all of my makeup.

My parents were remodeling their kitchen cabinets, so all of the old kitchen cabinets ended up in my dad’s shop. One day I happened to be out there, and noticed how many cabinets he had. I had been looking for a makeup storage cabinet for a while, but I couldn’t justify paying $75 for something to store makeup. When I saw the extra cabinets, I immediately thought of turning it into a makeup cabinet. It was the perfect size to fit in my room! The only problem was that it was the wrong color; all of the furniture in my room is dark brown, so that needed to be changed!

My dad was excited to help me revamp my cabinet, so we worked to sand it down and then paint the wood. It ended up looking just the way I wanted it to, and the best part was that rather than spending $75 on a cabinet, all I spent was $10 on paint!

I was super excited to share my cabinet with you, and would love to hear about your favorite DIY projects!

Anastasia Glow Kit Review

Walking around Sephora, it seems that every cosmetics brand has its own marketed highlighter. While they differ in packaging, it can be difficult to figure out which one is best suited for you. Of course, skin tone and formulation play a role in selecting the  best highlighter, but what if that highlighter actually comes with FOUR shades?? I was curious about the Anastasia Glow Kit because I wanted to figure out if all four shades were actually worth the price.

I’ve used Nars Albatross for a couple years as a cheekbone highlight, but I wasn’t ever into highlighting my entire face. Since struggling with oily skin since high school, I didn’t find the strobing technique of heavy highlighting very appealing. However, summer is in full swing and it seems like I need some more glow in my life. And by glow, I mean the Anastasia Glow Kit!

There are two different Glow Kit palettes; I have “That Glow,” which a Sephora associate recommended for my fair skin. It comes with four very well pigmented highlighters. I would except four full-size highlighters to run about $80-$120, but this palette is only $40. That means that each highlighter is $10!!

IMG_7429

Not only is this palette cost efficient, but the color payoff is exceptional, and the shine is incredible!! If you are looking for a subtile highlight, you can sweep a small amount on your cheekbone for a quick pick-me-up, or you can full-on strobe your face. I’m not a fan of the highlighters that have sparkles in them because I think they look tacky, but these ones are creamy and have a frosty satin finish, so they look very natural.

I have been wearing these highlighters to work and every day that I do, I get multiple customers complimenting me on how great my skin is!

IMG_7430

IMG_7432
From Left to Right: Dripping in Gold, Bubbly, Golden Bonze, Sunburst
IMG_7433
From top to bottom: Dripping in Gold, Bubbly, Golden Bronze, Sunburst

Sunburst is a light cream shade, it can appear white on the skin so it reminds me of Nars Albatross. I use this shade to highlight my chin, tip of my nose, and the tops of my cheekbones.

Bubbly and Dripping in Gold are so so similar it’s hard to tell them apart. Bubbly is a tad bit pinker, and Dripping in Gold leans more on the gold side. I like to mix the two to give a bit more dimension. I use these shades on my cheeks after I apply my blush, and on the sides of my forehead.

Golden Bronze is what the baby of a highlighter and a bronzer would look like. It is super shimmery, but also has a beautiful chocolate brown texture. On me it sheers out quite a bit, but my fairer-skinned sister can use this shade as a bronzer. I like to use this product underneath the area I apply my blush to make my cheekbones appear lifted. However, this shade would also look super chic when layered over a matte bronzer.

Overall, I think this palette is a must! It is the perfect compliment to sun-kissed summer skin, and can certainly be used all year around for a healthy-looking glow.

IMG_7518


Skin Care for Lazy Summer Days

Summer is in full swing, which means I have hours of free time to lay out in the sun and soak up some Vitamin D. But it also means that I have to spend more time protecting my skin. Everyone knows that the most important part of a summer skincare routine is sunscreen application, and I have had enough burns in my life time to vouch for that! My favorite sunscreen is the Neutrogena Clear Face Sunblock, because its oil-free formula doesn’t leave excess oil that can cause acne. Even though sunscreen will prevent sunburns, there may be some other sun concerns that you should watch out for.

2223679
Image from Ulta.com

Allergic, sensitive, sunburn- and eczema- prone skin can suffer from irritation through exposure to the sun. While sunscreen protects skin from UV rays, it doesn’t safeguard skin against irritation. This is why it is important to treat your skin after sun exposure. Here are some important steps I take to prevent sun irritation!

  1. After spending time outside, my dermatologist recommended that it is best to hop in the shower right away. I have an allergy to grass, so spending excess time outside can trigger a reaction. I recommend washing your body with a gentle, low-fragranced body was such as Dove Deep Moisture Body Wash. The formula is super gentle and won’t irritate sunburns.
    prod-pw-deep-moisture-body-wash-A
    Im

    2. Right after you get out of the shower, an important step is moisturizing! This is a great time to refresh and restore your skin after spending time baking your skin outside. Once again, fragrance-free is the best way to go, because it doesn’t irritate your skin. My favorite moisturizer of all time is the CeraVe Moisturing Cream. I absolutely adore this product, and even use it as my facial moisturizer. An added tip: If you put your moisturizer in the fridge, it will be even cooler and feel amazing on your skin, especially if you are a bit burnt.

    13977967
    Image from Target.com

    3. If you are sunburnt, this is the perfect time to lather some coconut oil or aloe vera on your skin. Everyone knows that aloe vera works great for sunburns, but I also think that coconut oil does the trick, as well.

I know that these are all pretty simple ways to protect your skin from the summer heat, and have certainly saved me a lot of stress over worrying about my skin. And while sunburns can be calmed after exposure, it’s always best to prevent them with sunscreen before they even start:)

The Perfect Brush Set

There is no such thing as a universal makeup brush collection. Everyone has their own wants and needs when it comes to the brushes in their vanity. I have a couple specific eye makeup brushes that have remained the staple for my everyday looks for a while now, and the size and shape of them creates a fabulous look for my eyes.

For Valentine’s Day my momma sent me the best gift ever–a new Real Techniques brush set! I was so excited to start using my new brushes, and now that I have been using my brush set for a while, I thought it was time for me to write a post so I could share how much I love them!


My favorite brush in the collection is the eyeliner brush. It is perfect for getting polished wings since the brush tip is so precise. I use this brush every day, and highly recommend using an eyeliner brush with a definite point rather than one that’s slanted. It will give you much better control, especially if you use gel eyeliner like I do!

Another brush I use on the daily is the highlighter brush. It is perfect for ladies who use powder highlighter. I illuminize with the Nars Albatross (a true love of mine:)) every day, so this brush gives me a perfect application.

The eyeshadow brush is a staple in my eye routine. I like to layer on a couple eyeshadows to get just the right look, and this one is great for applying the frosted shadow I use at the end of my routine. I have another brush by Sonia Kashuk that I prefer for an all-over-the-lid application, but this one is great for any glittery or frosted shadows.

The blush brush is also awesome! It’s super soft and gives a very delicate application, so it’s perfect for heavily pigmented blush formulas. Unfortunately I haven’t had the opportunity to use the foundation brush much, since I prefer to blend foundation with my fingers rather than with brushes. However, I have used it with a matte highlighter a couple times and I can say it gives an even application.